


I've been really enjoying keeping things simple lately. With the arrival of spring, a clean and simple palette keeps things fresh for me, so I let that freshness inspire our table setting, and this easy rope wrapped vase (or candle holder).

For this project you'll need:
Empty glass vase or jar
Heavy duty cotton twine
Scissors
Safety pin
Hot glue gun

Begin by braiding three strands of twine together. The length of the strands will depend on how big your vase is, but you'll need about two times the circumference of the vase multiplied by the number of times you want to wrap it (sorry for the math-speak). I find it easiest to use a safety pin to anchor the braid to something sturdy. Braid as carefully as you can in order to keep the cord flat, rather than twisted.
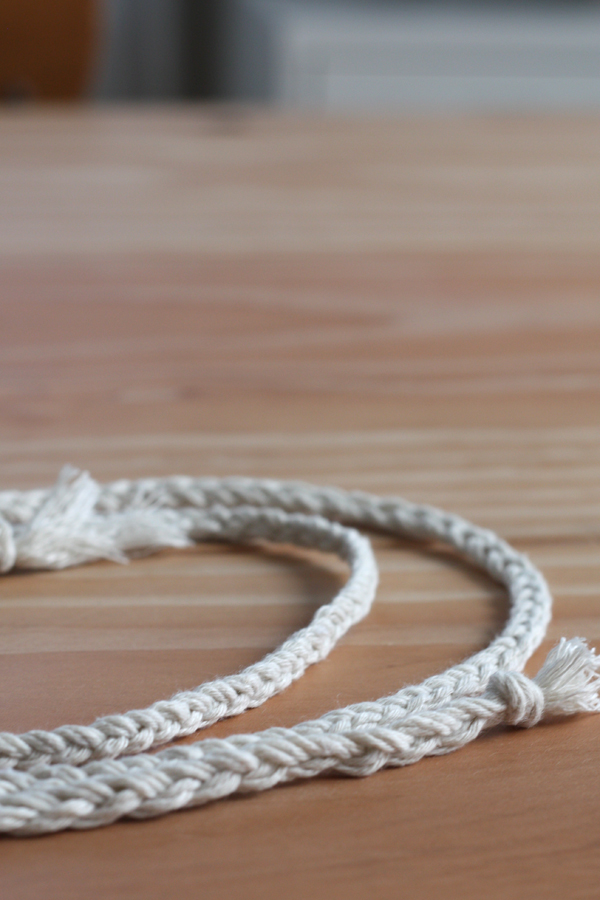
Once you have a braided cord of the length you need, tie a knot at both ends.

Attach the cord to the vase with a small amount of hot glue and let cool. Don't worry if glue seeps out around the cord, you can either remove it when it's still warm, or cut it away with an Exacto knife later.

Begin wrapping the vase, pulling the cord as tightly as you can without dislodging the glued end. Wrap until you've reached the end of the cord. Secure the end with more hot glue.
If you prefer to hide the ends, rather than have the knot showing, cut the knot off, apply the glue and tuck the end behind the cord above it to secure.

There are a number of variations you could try with this projects as well: wrapping it with unbraided twine or a piece of cotton rope; covering the rope with sections of colored thread; using colored twine instead of natural; etc. If you try any of these, I'd love to see!

Once your vase is complete, use it however you fancy. I planted herbs and flowers in mine, which will serve as the centerpiece of our Easter table, then be transplanted outside in a few weeks.
As always, if you make this project, share your photos with me- tag me on Instagram (@gatherandhunt) or Twitter (@gather_and_hunt), or post it to the G&H Facebook page!
Love the simple beauty of this. Really could be used anytime of year. Good job!
ReplyDelete